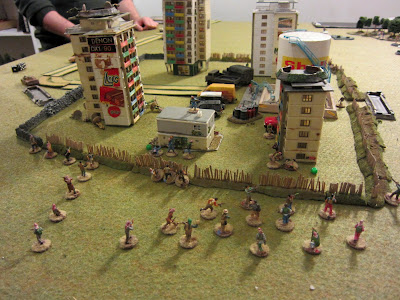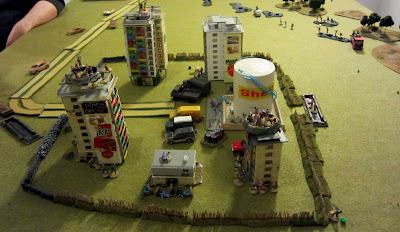
Confederate probing attack with all kinds of disadvantages:
-Overall commander who was drunk as a skunk during the battle
-Nearsighted brigade commander destined to die
-Almost all troops are as green as they come and armed with antique flintlocks to boot.
Overview of the battlefield from the Union's side.

The initial setup -Union pickets are beset with the Confederate horde.

Chaaaarge!

Union pickets start withdrawing as well as reinforcement battalion arrives at the ravine.

The pickets have withdrawn behind the second fence.

The other Union picket unit, Cavalry, gets annihilated in close combat and Crittenden starts to arrive with the Confederate main force.

Marching towards Washington!

Union reinforcements.

On the Confederate side only the Mississippi boys have guns that have any range.

Rebel trafic jam in making. Also, Zolicoffer gets killed.

Some not so spirited shooting.

Union reinforcements get closer. Those 2 batteries don't promise anything good for the rebels.

Confederates slowly organize their troops.

It is better not to shoot at enemy infantry at you when they are providing a meat wall against numerous enemy artillery...

Green troops on the receiving end of couple batteries is likely to result in a rout. Other units scramble to get off the open to avoid being bombarded to pieces. Confederate guns are finally in position too.

Flee! They're are shooting human beans ovah there!

Artillery duel. Some additional Union reinforcements arrive.

Pound 'em into oblivion boys!

Union dilemma: how to get past the batteries?
BTW I have no idea why this picture is totally of different color range...

The Confederates gain control of the Mill Springs Road.

Here starts the lesson of not tarrying in the road column on the battlefield.

Plenty of fire but to little effect.

Advancing in heavy woods in quite slow. Even more Union reinforcements arrive.

The Mississippi boys keep on taking the beating...

...so the Tennessee rookies need to bail them out by charging and driving away the enemy.

More Union reinforcements advance.

The Union troops didn't stay away for long though...

Firefight ensues on the other flank as well as the battalions battle it out in the orchard.

Confederates start taking positions on the edge of the wood -too bad their flintlocks have abysmally poor range.

Although it seemed to control it in the beginning the Confederate artillery lost the duel and retreated to the cover of the forest to secure the right flank with the Cavalry.

Lines are clearly forming on the left flank.

Unfortunately we had to end the game at this point since it was getting late.
Chris was going to play the last remaining rounds as a solo game to see how it went.
The confederate players informed Chris that since they are outgunned and outranged the only way they'll be able to win is by getting into close combat.
Here's his report:
Thanks! I hope everyone had fun with a very confusing and sprawling game. Strangely enough, I had thought it would get congested around the clear "lane" in the middle of the table, and instead the forces scattered to the wooded flanks! Is the artillery that powerful? Hmm ... I guess if you have flintlocks, yes, but they seem awfully easy to silence.
At any rate, I did finish out the final few turns. And ... how much detail do you want? In the northern woods, the Confederates retired out of close range and the Union troops realized that if they advanced they would get hit by the CSA guns in the field, so they held tight waiting for reinforcements ... which rolled Tardy every turn. So, no real action there.
In the main action to the south, the CSA launched its assault on turn 10, but a critical rally/retreat result on the middle regiment messed up the support waves, the far flanking units weren't able to move up in time, and the Union checked one of the two charges (both by the Trained units) with fire. The other charge started at CSA +1 and Union +0, and the CSA won by 2 and pushed the Union regiment back 2". During Union turn 10, a whole brigade piled into the CSA regiment in the salient, and pushed it back out of close range. Everybody was disordered, but the Union line looked pretty strong.
On the CSA turn 11, the CSA regiment at the rear table edge finally routed off the table, which brought the CSA to Heavy Casualties and Greater Casualties ... ouch (but they don't apply until next turn). The CSA managed to rally everyone in the south and launch another supported charge across the open field, but it was checked by withering fire. The CSA did manage to disorder the entire Union line again, but it was looking gloomy for the South. In the Union turn 11, the northern part of their line had to retreat out of close range - but even this was bad for the CSA, as they had to retreat out of enemy musket range but had rifles themselves to reply with. The rest of Union line rallied and kept up the fire on the CSA line, hoping for bad morale results next turn.
On CSA turn 12, the main CSA brigade in the south broke (all it took was rolling a 4). Four of the five regiments broke, and the fifth retired into the woods. The other pair of units from Zollicoffer's old brigade rallied, and established a sort of rearguard line. That pretty much ended the game as I saw it, but despite being driven back the CSA still held the Cumberland Pike at game's end.
So, the final results were: Union 2 (inflicting heavy casualties and greater casualties), CSA 1 (key position). It was a marginal victory for the Union, but all in all the CSA did pretty well with the vast limitations of their forces.
Wikipedia entry of the battle
Janne
(Played: Jan 23rd at Chateu d'Tenwolde. GM: Chris. Confederates: Janne, Mr V. Union: Aksu, Chris.)


